Welcome to My Darkroom Page
Copyright
1996-2005 by Roger Russell
All rights reserved
No portion of this site may be reproduced in whole or in part
without written permission of the author.
Other pages about my work
After taking several rolls of pictures, a different kind of work begins. This requires working in the dark or with a not-too-bright safelight and lots of patience. It also requires a whole set of equipment and chemicals to process the film and prints. Then there is exposing the print paper either with a contact printer or more commonly with an enlarger. After that, there’s more developing and drying before the quality of the print can be assessed. Hours can be spent in the darkroom just to produce one good print. Over the years, I bought several pieces of equipment that would reduce the amount of time I spent in the darkroom and gave more repeatability to the printing process.
![]()
Developing tanks

The Nikor stainless steel tanks were the only way to go. Temperature was easy to control and the tanks were easy to clean. I have been using them since the 1950’s. The large one is for 120 film and the smaller one is for 35 mm film. I also had a double tank that holds two rolls of 120 film as well as a small reel for 110 film.
![]()
Scale
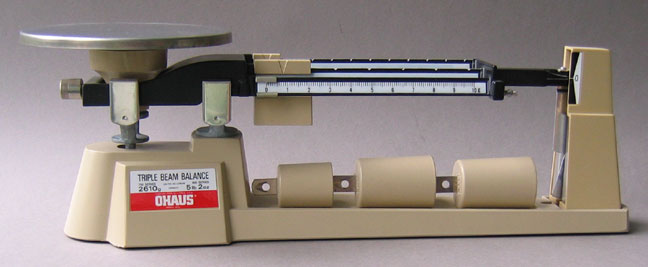
A balance type scale was needed to weigh the dry bulk chemicals to smaller proportions. This scale is accurate to 0.1 grams. Items up to 2610 grams can be weighed using the supplementary weights shown under the sliders. The balance indicator at the right has magnetic damping to reduce the number of oscillations before a reading can be taken.
Alternately, Chemicals could be bought already mixed. However, they did have a finite shelf life and I didn’t do darkroom work every week or even every other week. It was less expensive to mix them as they were needed.
![]()
Magnetic Stirrer
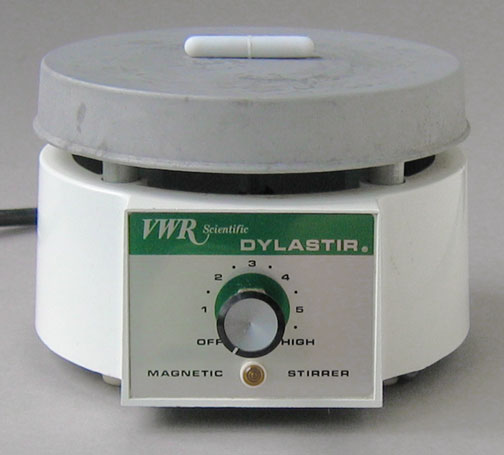
I used to mix the dry chemicals with a stirring rod but later found that a magnetic stirrer was far more convenient. The bottom part of the stirrer has a motor with a magnet attached to the shaft located just below the table at the top of the stirrer. A Teflon covered magnet can be placed in the mixing container and it will orient itself to follow the magnet under the table. A speed control is shown at the front.
![]()
Compensating Developing Timer
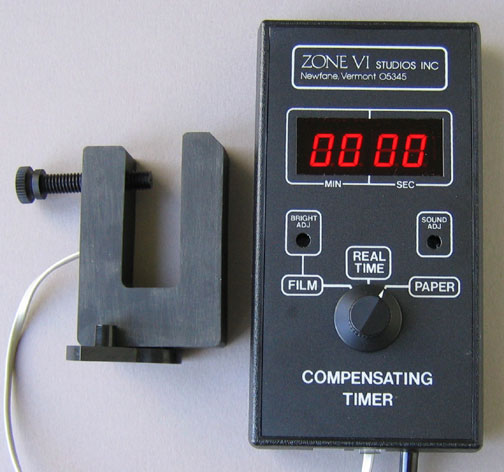
Controlling the temperature for developing negatives and prints was always a problem. The tap water temperature varied widely from summer to winter and I was either adding ice in the summer or mixing hot water with the cold in the winter. At last, in the 1980’s, Zone VI came up with a timer that would speed up or slow down the developing time depending on the temperature. It would insure more consistent and repeatable negatives and prints. The clamp at the left can be attached to the developing tray or sink holding the developing tank. The sensor is at the end of the clamp. This made things so much easier. It eliminates at least some of the variables in processing.
![]()
Darkroom
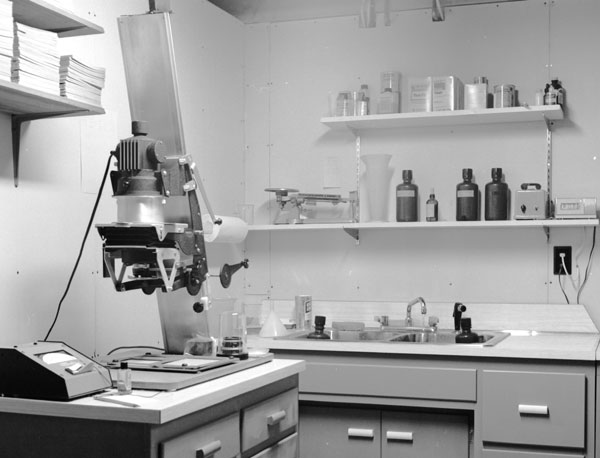
In 1953, I bought an Omega B-6 condenser enlarger and used it for many years. This had a 75 watt incandescent light source. I bought Nikkor lenses for both 35 mm size negatives and 2-1/4” negatives. In 1967, I moved from Brewster, NY to Binghamton. NY and made a darkroom in the furnace room. I finished off the walls and assembled the cabinets from kits and added Formica tops. I also installed the plumbing for the sink.
About 1979, I bought a cold light source and stabilizer from Zone VI. The cold light source replaced the incandescent lamp and large condenser lenses in the B-6. The condenser approach had more contrast and the cold light gave better gray tones, taking away some of the harshness to the prints. The stabilizer was needed to compensate for the light output as it varied from when it first turned on to when it was on for some time. A photocell was used to monitor the output and circuitry adjusted the light output to be constant.
![]()
Vivitar VI Color Enlarger
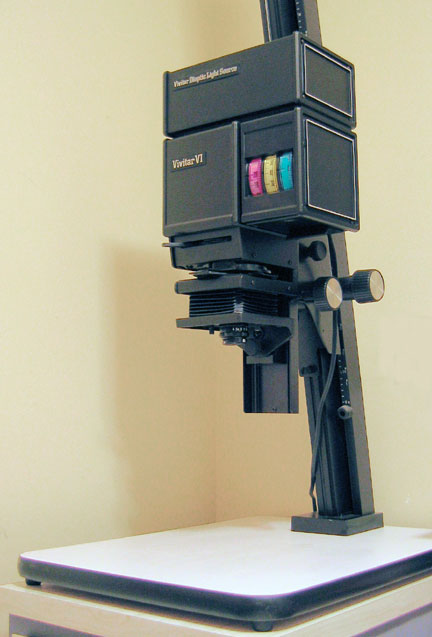
In 1977, I bought a Vivitar VI enlarger. It is very unique. It has a quartz halogen lamp and a separate stabilized power supply for the 18 volts needed to power it. The lamp is located in a separate compartment so that heat will not get to the negative. Both ultraviolet and infrared filters are incorporated to eliminate unwanted radiation from the lamp. Light passes through the adjustable dichroic color filters and then to a plastic light pipe. The light then enters a triple condenser system and finally goes to the negative and enlarging lens. The color filters can be used for either color work or for variable contrast black & white paper. The enlarger sold for $399
![]()
Grain Focuser
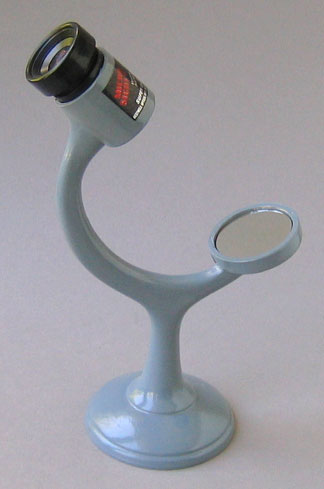
I worked for many years without a grain focuser but finally gave in and bought one. It made focusing so much easier by being able to actually see the grain in the negative instead of just what appeared to be overall sharpness. The bottom part has a front surfaced mirror and the top part has a magnifying lens.
![]()
Heathkit Darkroom Computer
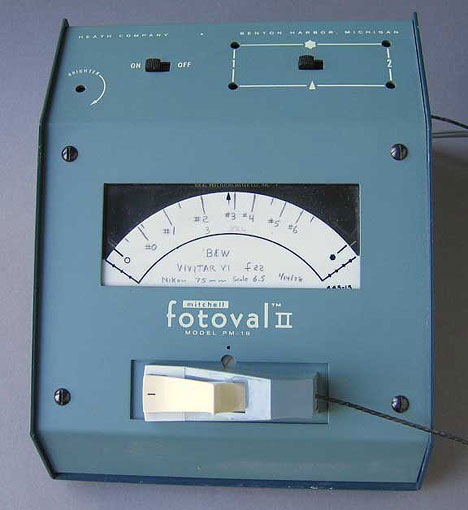
This is the Heathkit fotoval II. It is used to determine the contrast value for the printing paper and was a great time saver. I purchased this in the late 1960’s and used it much of the time. The probe is at the bottom of the unit and can be removed and placed on the paper easel. With the negative projected on the easel, the white cover can be pulled back to expose the photocell. The photocell is then placed in the brightest area of the picture. The enlarger lens f-stop is then adjusted for a full scale reading at the dot. The probe is then placed at the darkest part of the picture and the required contrast paper can then be read on the dial.
In my early days of printing I used Dupont Varigam variable contrast paper. Later I switched to Kodak Polycontrast paper, which was essentially the same. Different color filters were required to produce the different contrasts. With the Omega B-6 enlarger, the filters were placed between the lens and the paper. With the Vivitar VI enlarger that I bought later, filtering was done prior to the lens and avoided any distortion caused by the filters. Much later, I used Zone VI “Brilliant” enlarging paper for some really fine quality work. It was not variable contrast but produced excellent prints.
I did very little color work. This was even more demanding than black & White. The chemicals and printing paper were more expensive and the temperatures were supercritical.
|
About This Site |
|
|
Last
update was |
More text and pictures will be added to these pages as time permits. Any comments are welcome. |
|
|
|
|
Email
to |
Created
by Roger Russell |